
Why most shingle roof failures start at the nails and how to avoid it isn’t something most homeowners think about until there’s already a problem. From the street, asphalt shingles can look completely fine—clean lines, no obvious lifting, nothing to raise a red flag. But what’s happening underneath often tells a different story.
Most of the time, it’s not the material and it’s not the age. It’s the way the nails were installed. Errors in nail placement, drive depth, or angle quietly compromise the entire roof system—and you won’t see it coming until loose shingles, lifted edges, or an active roof leak make the damage undeniable.
This guide covers what actually goes wrong, what early warning signs to look for, and how proper shingle nailing during installation keeps a roof performing the way it should—and lasting 20–30+ years instead of failing at 5–10. Improper nailing can cause failures as early as 5–10 years in—regardless of material quality.
Key Takeaways
- Nail placement is the most common cause of early roof failure—not defective shingles or poor materials.
- Improper nailing—including high nailing, overdriven nails, and underdriven nails—weakens the entire roof system and accelerates failure.
- Each asphalt shingle requires 4 nails in standard conditions and 6 in high wind areas like Central Texas.
- Once loose shingles form, wind uplift takes over fast—leading to water infiltration, roof deck damage, and structural spread.
- Catching nail head issues early through a focused roof inspection prevents the kind of damage that requires full replacement.
How Improper Nailing Breaks the Roof System
The strength of any shingled roof depends on consistent, accurate nail placement. Every row of asphalt shingles is designed to be fastened along a defined nail line so the overlapping layers lock together and tie into the roof deck as one sealed system. When that doesn’t happen, the system begins to lose integrity from the inside out.
With improperly located nails, high nailing, or the wrong drive angle, nails miss the reinforced section of the shingle, the shingle mat isn’t supported where it should be, and the connection between layers weakens across the roof system. Even small inconsistencies leave sections of the roof acting independently instead of as one surface.
Once that connection is compromised, wind exploits it quickly. Air gets under the lower edge of the shingles, the bottom portion lifts under wind pressure, and repeated movement loosens the hold of the nails. This is especially common with high nailing, where the lower portion of the shingle isn’t secured at all. That’s when loose shingles begin forming, even in normal conditions—and far sooner in high wind areas.
That same movement creates pathways for water. The seal between shingles weakens, small gaps form along the shingle surface, and water works its way underneath until it reaches the roof deck. When shingles slide out of position due to poor nailing, they create uneven rows and gaps that worsen over time as gravity pulls them further down the slope. What starts as a fastening problem becomes a structural one.
The Most Common Nail Errors That Lead to Loose Shingles
Overdriven Nails
Overdriven nails are driven with too much force—most often from pneumatic nail guns set at too high a pressure, or from inexperienced roofers rushing through an install. Instead of holding the shingle, the nail head cuts through the shingle mat and eliminates most of the holding strength. The shingle is technically fastened, but it’s no longer secure.
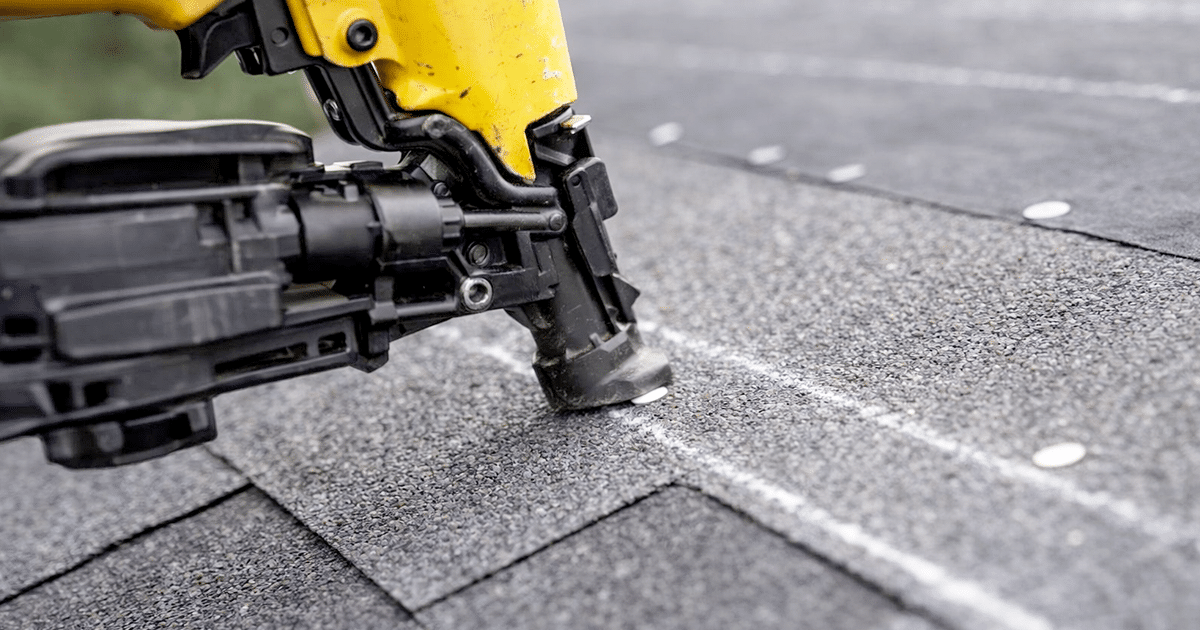
During a roof inspection, check nail heads at the shingle surface. They should sit flush—not sunk in, not raised. Overdriven nails that have cut into the shingle will often show as slight depressions or cracked shingle material around the fastener. Left in place, they lead to continued movement and eventually missing shingles after a significant wind event.
Underdriven Nails
Underdriven nails sit too high above the shingle surface. They don’t fully engage the roof deck, and they prevent proper sealing between the shingle and the layer below. Raised nail heads create gaps that let wind-driven rain penetrate the roof system—especially during the kind of heavy Texas storms where water is moving horizontally.
Like overdriven nails, this is a calibration problem. Too much pressure drives nails deep; too little leaves them proud. Both are considered improperly driven nails, and both create the same result: a roof that looks installed but isn’t secured.
High Nailing and Improperly Located Nails
High nailing happens when nails are placed above the intended nail line on the shingle. It might look minor from the ground, but high nailed shingles are among the most vulnerable to wind damage and early failure. With high nailing, the lower portion of the shingle isn’t secured, the overlap between layers doesn’t lock in, and the roof system becomes far more susceptible to wind uplift.
A simple field check: measure from the shingle’s lower edge up to the fasteners. If they’re sitting above the manufacturer’s designated nail line, they’re not doing their job. Improperly located nails of any kind—whether too high, too low, or off-center—reduce how well the shingles hold together and how long they last in high wind areas like Central Texas.
Angled and Skipped Nails
Not every issue comes from placement alone. The drive angle matters too. Angled nails don’t fully penetrate the roof deck, create uneven pressure points across the shingle surface, and loosen faster under wind load. Combined with skipped or missing nails—where crews don’t hit the required count per shingle—these are examples of poor installation that compromises the roof system from day one.
Look for missing nails in consistent rows, uneven spacing, or patterns that don’t match standard nailing shingles layouts. These details don’t stand out at first glance, but they’re frequently behind early movement and loose shingles down the road.
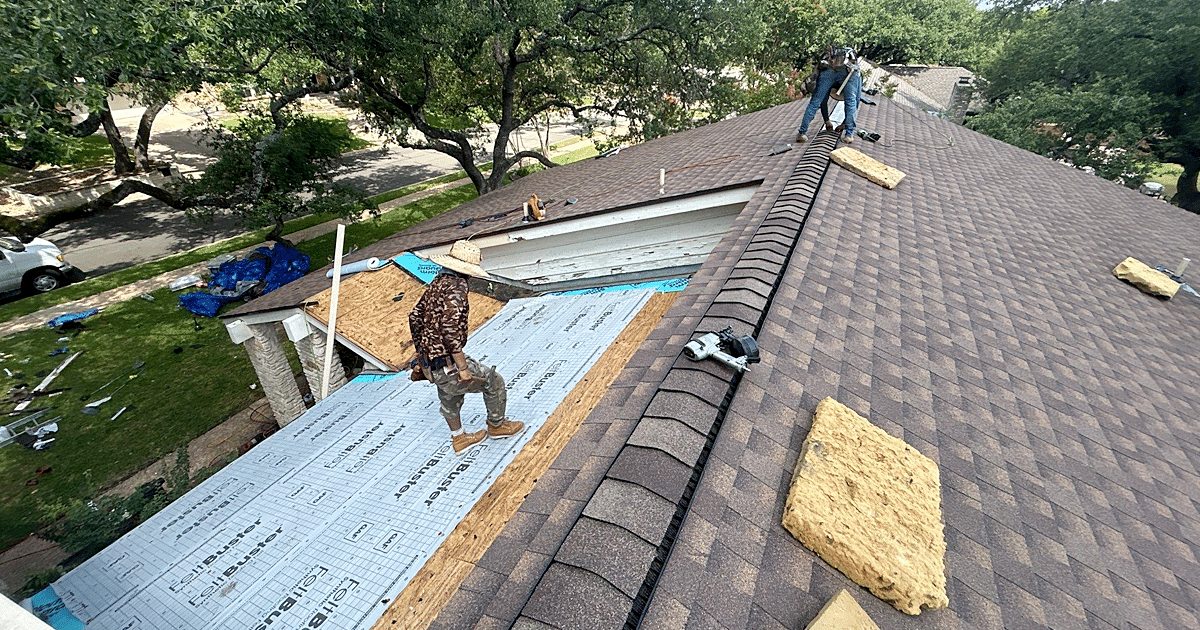
Proper Shingle Nailing Standards for Asphalt Shingles
If there’s one part of a roof install that shouldn’t be guessed on, it’s shingle nailing. Every manufacturer publishes specific fastening requirements for their asphalt shingles, and those requirements exist because they’ve been tested against real wind and weather conditions. Following them is how a properly installed roof earns its warranty and its lifespan.
Manufacturer Nailing Zone
Each shingle has a defined nail line—the reinforced strip designed to hold the fasteners and tie multiple layers of shingles together. For proper shingle nailing, all nails must fall within that zone, pass through both the top and underlying shingles, and be driven straight. Missing that zone by even a small margin leads to improper nailing and weakens how the roof system holds up under wind.
Correct Nail Size and Length
Most asphalt shingles require a minimum 12-gauge shank, a minimum 3/8-inch diameter nail head, and a length of 1¼” to 1½” depending on the number of layers and roof deck thickness. The goal is full penetration into the decking so the fastener actually anchors the shingle—not just sits in the surface layer.
Required Nail Count per Shingle
Most standard installs call for 4 nails per shingle under normal conditions and 6 nails per shingle in high wind areas. That count matters. Consistent nailing shingles across the full roof keeps load evenly distributed and helps the system resist wind uplift. Skipping nails—even occasionally—creates weak points that wind events will find.
Nailing Shingles: Correct Technique from the Ground Up
Align Nails Within the Nailing Strip
Every row of asphalt shingles includes a marked or visible nail line. That’s where the fasteners belong—centered within the strip, consistently spaced, and driven so each fastener catches the layer below. Drifting above or below that strip leads to high nailing or improperly located nails, both of which reduce how well the shingles stay locked together across the roof system.
Drive Nails Flush with the Shingle Surface
Depth is just as critical as placement. Nail heads should sit flush with the shingle surface—not sunk in, not raised. Overdriven nails cut into the shingle mat and lose their holding strength. Underdriven nails create a gap between the fastener and the shingle, compromising proper sealing and leaving the roof system exposed to wind-driven rain. Both are improperly driven nails, and both create movement over time.
Use Vertical Nail Placement Only
Every nail should be driven straight—not angled. Straight nail placement ensures full contact between the nail head and the shingle, and allows the fastener to penetrate cleanly into the roof deck. Angled or improperly driven nails don’t anchor correctly, which leads to shifting when the roof faces wind pressure. Calibrating pneumatic nail guns before each job is one of the most reliable ways to maintain consistent depth and angle across an entire install.
Roof Inspection Checklist: What to Look for at the Nail Level
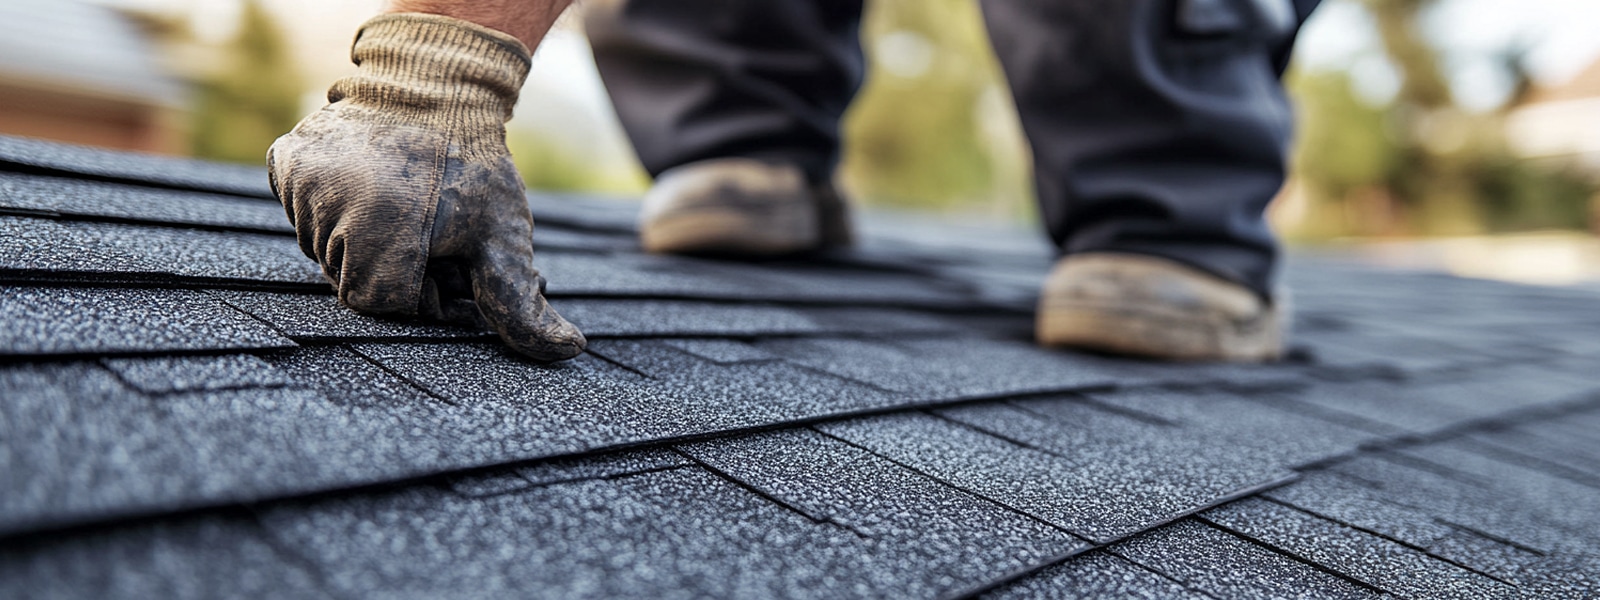
You don’t need to tear anything apart to catch early problems. A focused professional roof inspection can reveal a lot just by examining how the nails were placed and how the shingles are sitting. Here’s what to look for.
Inspect Nail Lines from Eaves to Ridge
Start at the lower edge and follow each row up. Look for consistent nail placement across the roof system. Watch for areas where high nailing or improperly located nails may have shifted the fastening pattern. If the line changes from one section to another, that’s usually a sign of inconsistent shingle nailing—and a prompt for a closer look.
Check for Exposed Nail Heads, Rust, and Popped Fasteners
Over time, some nails will work loose or begin to corrode. Warning signs to look for include raised or popped nail heads pushing through the shingle surface, discoloration or rust around exposed nail heads, and sections where the shingles don’t sit flat. Any exposed nail is a potential entry point for water and a sign the roof system isn’t holding where it should be.
Document Improperly Driven Nails Visually
If something looks off, photograph it. Capture close-ups of overdriven nails, underdriven nails, or uneven nail heads. Note any sections with visible gaps or irregular nail placement. Having that documentation makes it easier to track progression over time and gives a contractor a clear starting point if repairs are needed.
Repair Strategies for Improperly Located Nails
When nail placement issues show up, the fix depends on how the shingles and roof deck are holding up. Some problems can be corrected early. Others require a more involved approach.
Replace Overdriven Nails When Found
Overdriven nails lose holding power because they cut into the shingle mat instead of securing it. When found, remove the compromised fasteners, install new shingles where the shingle surface is damaged, and drive replacement nails flush within the correct nail line. Leaving them in place leads to continued movement in that section.
Reset or Refasten Underdriven Nails
Underdriven nails don’t fully secure the shingles, but they can often be corrected. Carefully reset the existing nails if they’re still aligned within the nail line, or remove and refasten using proper nailing technique. Confirm proper sealing by verifying the nail heads sit flush—this restores hold without disturbing surrounding shingles.
Partial Re-Nailing When the Deck Is Sound
If improperly located nails or improperly driven nails are spread across a section, partial rework may be needed. Lift the affected shingles carefully, reinstall with correct nail placement and spacing, and follow proper nailing shingles patterns throughout. This approach only holds if the roof deck is still solid. If the decking has softened or deteriorated from water infiltration, especially after severe storms, storm damage roof repair is needed to address that area first.
Preventive Measures and Installer Best Practices
Most problems tied to improper nailing don’t come from bad materials. They come from rushed installs, inexperienced roofers, or crews not paying attention to the top causes of roof damage that actually hold the roof system together. The fix starts before the first shingle goes down.
Follow Manufacturer Instructions Every Time
Every brand of asphalt shingles comes with clear guidelines for shingle nailing—exact nail placement along the nail line, required count per shingle, and approved fastening patterns for different wind conditions. Those aren’t suggestions. Failing to follow manufacturer specifications voids warranties and leaves the roof system performing below what it was designed for.
Use Properly Calibrated Pneumatic Nailers
Pneumatic nail guns are efficient—but pressure settings drift, and most crews don’t check them often enough. Miscalibrated guns create uneven nail placement across the entire roof system. Crews should calibrate their guns before each job and verify drive depth on scrap material before starting on the field.
Train Crews on Proper Shingle Nailing
Even with the right tools, it comes down to the people installing the shingles. Crews should know how to hit the nail line consistently, drive nails straight at the correct angle, and follow the right nailing shingles pattern across the entire roof system. When everyone on the crew understands proper nailing technique, you don’t end up with sections of the roof behaving differently from the rest—which is exactly how common mistakes become expensive callbacks.
When to Repair vs. Replace the Roof System
When a Spot Repair Makes Sense
Repairs are usually the right call when the problem is limited and the shingles are still in good structural condition. Reasonable candidates include small areas with improperly located nails or isolated high nailing, a handful of overdriven nails confined to one section, minor movement with no widespread loose shingles, and a roof deck that’s still solid with no soft spots or water damage. Correcting nail placement in these areas and re-securing the affected shingles can restore performance without disturbing the rest of the roof.
When Full Replacement Is the Better Option
There’s a point where repairs stop making sense. Signs pointing toward replacement include widespread improper nailing across multiple sections, consistent high nailing patterns throughout the roof system, large areas of missing or loose shingles or uneven lines, repeated problems after previous repair attempts, and evidence that the fastening pattern was wrong across the entire install. If the shingle nailing was done incorrectly from day one, fixing isolated spots won’t solve the bigger problem—the system will continue to fail in new locations.
Bring in a Third-Party Inspection When Needed
If there’s any question about whether to repair or replace, a neutral roof inspection with a detailed report helps clarify the decision. A third-party inspector can evaluate overall nail placement and fastening patterns, identify areas of improperly driven nails or missed nail line zones, and document conditions across the full roof system, which can inform ongoing industrial roof maintenance practices for larger properties. If you’re dealing with an insurance claim or a dispute with a contractor, having that paperwork already in hand makes a real difference.
Conclusion and Homeowner Actions
Small issues with nails don’t stay small. Water infiltration, common causes of roof damage, and accelerated aging all follow when nail placement is off—and they follow faster in a Texas climate where storms hit hard and temperatures swing wide.
Schedule a Roof Inspection Now
If your roof hasn’t been checked recently, it’s worth scheduling a roof inspection before your next storm season. Catch early signs of movement before they turn into bigger problems, identify areas with improper nailing or shifting shingles, and get ahead of issues caused by wind and seasonal wear with a mix of DIY roof waterproofing steps and access to emergency roof repair services when severe weather hits. Even newer asphalt shingles can have problems if the install wasn’t done right, making timely professional roof repair services especially important.
Ask the Right Questions During the Inspection
Don’t just ask if the roof “looks good.” Ask whether the nails are hitting the correct nail line, whether there are signs of high nailing or improperly located nails, and whether the nail heads sit flush with the shingle surface. These details tell you how well the roof system was actually installed—not just how it looks from the street.
Hire Installers Who Get the Details Right
The long-term performance of your roof comes down to how the shingles were fastened. Look for a qualified contractor who follows proper shingle nailing standards, ensures crews understand correct angle, depth, and spacing, and can explain their nailing shingles process across the entire project. Good materials matter. But proper installation—done right the first time—matters more.
FAQs
How do I know if my roof has nail problems?
You usually won’t see the nails themselves, but the shingles will give it away. Look for uneven or slightly lifted shingles, early signs of loose shingles in certain sections, or rows that don’t line up straight across the roof. A proper roof inspection can confirm whether nail placement is the issue.
What is high nailing and why is it a problem?
High nailing happens when nails are placed above the manufacturer’s designated nail line. When that happens, the lower portion of the shingle isn’t secured, the layers don’t lock together properly, and the roof system becomes far more vulnerable to wind uplift. High nailed shingles are among the most common causes of early failure in Texas wind conditions.
Are overdriven nails really a big deal?
Yes. Overdriven nails cut through the shingle mat and significantly reduce holding strength. That leads to movement in the shingles, faster wear around the fastener, and increased risk of failure during high-wind events. The damage isn’t always visible from the ground, which is why a focused roof inspection is the best way to catch them.
What happens if nails are underdriven?
Underdriven nails don’t fully seat against the shingle surface, leaving raised nail heads that prevent proper sealing. This creates gaps that allow wind-driven rain to penetrate the roof system—especially in storms. The gaps may look minor, but they’re enough to let water reach the roof deck over time.
How many nails should be used per shingle?
Most asphalt shingles require 4 nails per shingle under standard conditions and 6 in high wind areas. In Central Texas markets prone to storms and high winds, a 6-nail pattern is often the right call regardless of what minimum standards say. Consistent nailing shingles across the full roof is key to keeping everything secure.
Can nail issues be repaired without replacing the whole roof?
Sometimes. If the problem is limited to a small section, improperly located nails can be corrected, improperly driven nails can be reset or replaced, and affected shingles can be re-secured. If the poor installation is widespread across the roof system, spot repairs usually won’t hold long-term.
Does wind make nail problems worse?
Wind is what exposes weak nail placement fastest. When shingle nailing isn’t done correctly, air gets under the shingles, movement increases with each gust, and the weakest sections fail first. That’s why these issues surface quickly in high wind areas—and why Texas homeowners are often the first to find out their install had common mistakes in it.
Can improper nailing cause leaks?
Yes, though not always immediately. When improper nailing leads to shingle movement, the seal between layers weakens, small openings form along the shingle surface, and water infiltration begins. It usually starts small—then spreads across the roof system as more shingles loosen and the roof deck gets exposed to repeated moisture cycles.
Do all contractors follow proper nailing standards?
No—and that’s where most problems begin. Some crews rush through installs, miss the correct nail line, or use inconsistent nailing shingles patterns. Hiring a qualified contractor who follows manufacturer specifications, trains crews on proper shingle nailing, and backs their work with a workmanship warranty is the most reliable way to avoid these problems entirely.
Contents
- How Improper Nailing Breaks the Roof System
- The Most Common Nail Errors That Lead to Loose Shingles
- Proper Shingle Nailing Standards for Asphalt Shingles
- Nailing Shingles: Correct Technique from the Ground Up
- Roof Inspection Checklist: What to Look for at the Nail Level
- Repair Strategies for Improperly Located Nails
- Preventive Measures and Installer Best Practices
- When to Repair vs. Replace the Roof System
- Conclusion and Homeowner Actions
- FAQs

