
When strong winds start testing your home, the difference between a roof that holds and one that fails usually comes down to preparation, not luck. Windproofing your roof options are not about chasing the strongest shingle label or the most expensive material on the shelf; they are about building a system that works together, from the deck up, to resist uplift, pressure changes, and wind-driven rain. Homeowners in wind-prone areas often assume damage is unavoidable, but most failures trace back to missed details rather than extreme conditions alone.
This guide walks through what actually makes a roof perform when the weather turns aggressive. You’ll see which upgrades matter most, where wind damage almost always starts, and how smart design and installation choices can dramatically improve your roof’s odds of staying put when the next storm rolls through.
Key Takeaways
Learn more about the top five causes of roof damage to ensure your roof stays protected.
- True windproofing means combining stronger roofing materials (metal, high-rated shingles, tiles) with upgraded edge details, fasteners, and deck attachment—no single product does it alone.
- Homeowners in 90–150 mph wind zones should look for ASTM D7158 Class G/H or ASTM D3161 Class F shingles, or tested metal systems, plus Fortified-style detailing.
- The most critical areas to upgrade are roof decking, perimeter edges (eaves and rakes), hip and ridge sections, and ventilation components like ridge vents.
- Professional design and installation to local 2021–2024 code standards is essential to make any wind resistant roof actually perform as rated.
- Documented upgrades like Fortified Roof certification can qualify for insurance premium discounts in many coastal states.
When high winds blow through your neighborhood, your roof is the first line of defense between your home and the storm. But here’s what most homeowners don’t realize: the labeled wind rating on your shingles or panels means nothing if the installation details aren’t right.
This guide breaks down exactly what separates roofs that survive major storms from those that fail catastrophically—and the specific upgrades that actually deliver wind resistance you can count on. For tips on how to protect your roof during events like the 4th of July, see our recommendations.
Understanding Wind Damage and Why Roofs Fail
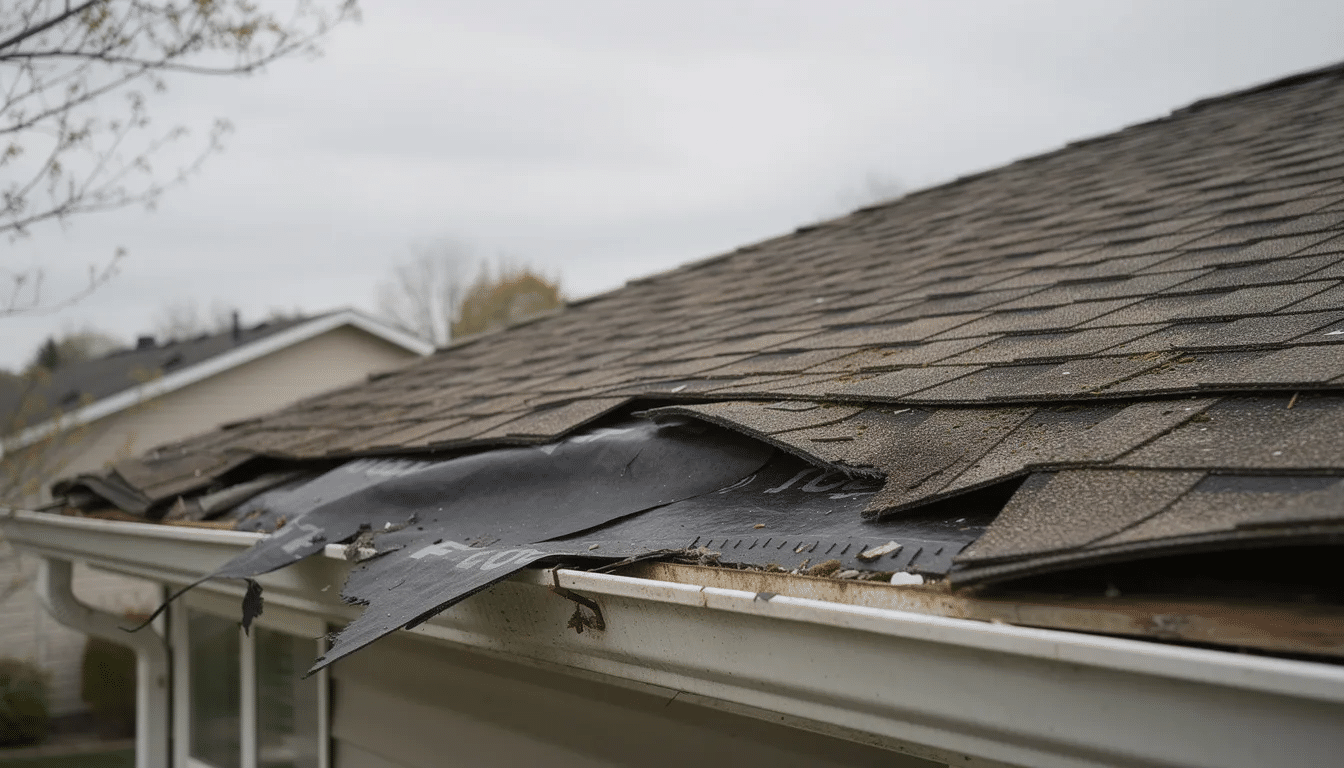
The primary threat to your roof during severe weather isn’t wind pushing down on it—it’s wind pulling up. When wind moves across a roof surface, it creates negative pressure above the structure due to temperature and pressure differences. This phenomenon, called wind uplift, generates suction forces that can lift shingles, peel back metal panels, and even separate entire roof sections from the framing below.
Wind driven rain compounds the problem. Once uplift pressure lifts even a few shingles, water infiltrates the exposed deck and underlayment, causing extensive water damage to the structure, walls, and interior finishes. In severe weather conditions, this one-two punch of lift and rain accounts for the majority of residential roof failures.
Here’s how different wind speeds typically affect roofs:
| Wind Speed | Typical Damage Pattern |
|---|---|
| 45–60 mph | Minor shingle lift at edges, loose ridge caps |
| 90–110 mph | Widespread shingle loss, especially at corners and eaves |
| 120–150 mph | Major structural damage, deck failure, complete roof loss possible |
Roof shape dramatically influences how much uplift acts on the structure. Hip roofs, with their four-sided sloping geometry, deflect wind evenly and reduce uplift by 20–30% compared to gable roofs. Gable ends act like sails, catching gusts and creating hinge failures where the roof meets the walls. Height and exposure matter too—a three-story home on an open coast experiences far greater forces than a single-story in a sheltered suburb. Homeowners should also take steps to protect their roofs from hurricane damage by following preventative measures and regular maintenance.
Post-Hurricane Ian inspections in Florida revealed a consistent pattern: corners, the eave edge, and rakes experienced the highest suction forces and failed first. Even when the main field of shingles remained intact, edge failures allowed wind and rain to cascade inward, destroying otherwise sound structures.
Perhaps the most important finding from storm damage studies: poor installation causes more failures than inadequate materials. Under-nailing, wrong nail placement, and cheap sealants account for the majority of roof damage claims. A Class H-rated shingle installed with staples and minimal sealant will fail long before a Class D shingle properly fastened with ring-shank nails and sealed at every edge.
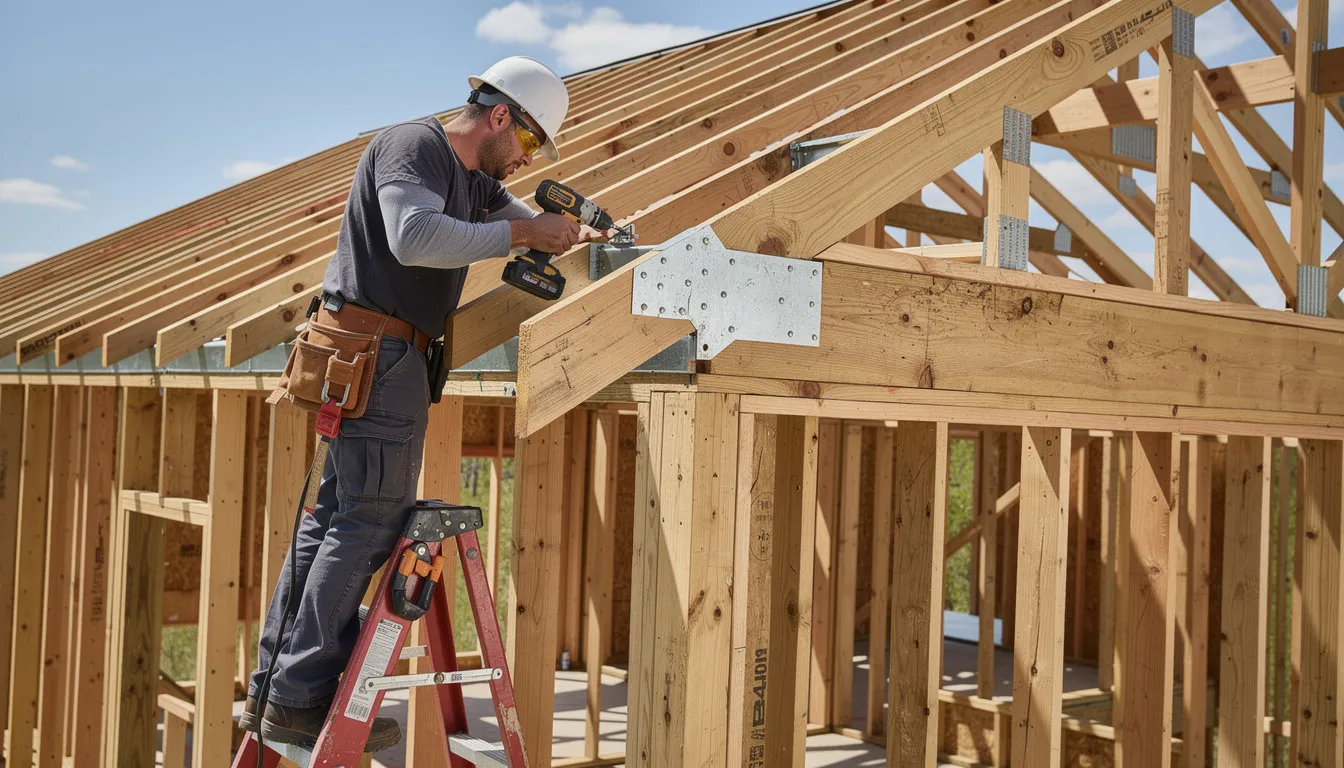
Start at the Base: Roof Deck and Structural Attachment
Windproofing starts beneath the shingles or panels, at the sheathing and framing level. The strongest roofing materials in the world won’t help if the roof sheathing tears away from the rafters during hurricane force winds.
Modern roof decking specs call for 7/16-inch OSB or 1/2-inch plywood as a minimum. However, if you’re in high wind regions with basic wind speed ratings above 120 mph, upgrading to 5/8-inch thickness significantly improves nail holding capacity and overall rigidity. This thicker deck creates a more stable base for the entire roofing assembly.
The real game-changer for existing homes is what the industry calls “enhanced nailing” or Fortified-style re-nailing:
- Use 8d ring-shank nails (not smooth-shank)
- Space nails at 4 inches on center at panel edges
- Space nails at 6 inches on center in the field
- Drive every nail into rafters or trusses, not just through sheathing
Why ring-shank nails? Their deformed shanks increase pullout resistance by approximately 50% compared to smooth nails. Testing shows that roofs fastened with staples typically fail at around 90 mph, while the same sheathing secured with ring-shank nails can withstand 130 mph or more.
Hurricane clips and straps complete the load path from roof to foundation. These galvanized steel connectors tie rafters or trusses to wall plates and can be rated for loads up to 500–1,000 pounds per clip depending on gauge and embedment depth. Modern building codes in Florida, Texas, and the Carolinas now mandate these connections for new construction in high wind areas.
For re-roof projects where full sheathing replacement isn’t in the budget, upgrading the deck nailing pattern from inside the attic (where accessible) is often the single most cost-effective uplift improvement you can make.
Edge Defenses: Eaves, Rakes, and Drip Edge Upgrades
Wind almost always attacks the roof from the edges first. The perimeter of your roof experiences the highest uplift pressure during a storm—often two to three times the forces acting on the center field. This makes edge detailing absolutely critical for any wind resistant roof.
Standard residential drip edge is typically 2–3 inches wide and lightly nailed. For areas prone to strong winds, upgraded drip edge should meet these specs:
- 5–6 inch roof leg width (not the standard 2–3 inches)
- 26-gauge or heavier galvanized steel, or corrosion-resistant aluminum in coastal zones
- Fastened through sheathing into framing at 4 inches on center using a W-pattern
- Overlapped 3 inches minimum at joints
Why does overhang matter? The farther shingles extend past the drip edge, the more leverage wind has to peel them back. Fortified standards call for minimizing shingle and starter strip overhang to 0–1/4 inch past the drip edge. This seemingly small detail makes it dramatically harder for gusts to grab and lift the roof surface.
Starter strips deserve special attention at both eaves and rakes. The best practice options include:
- Factory self-adhered starter shingles specifically rated for high wind
- Peel-and-stick edge seals under the first course
- An 8-inch band of asphalt roofing cement under the first course of shingles
In high velocity hurricane zones with basic wind speed ratings of 120–150 mph, many local building codes and insurers now reference Fortified details requiring mechanically fastened drip edge plus a fully sealed underlayment at all roof edges. These upgrades add modest cost but prevent the cascade failures that turn minor shingle loss into total roof destruction.
Fasteners and Nailing Patterns That Actually Hold
The same shingle can perform very differently depending on the nails used and how they are placed. This is one area where installation techniques matter as much as material selection.
Proper nail specifications for steep slope roofing products include:. It is also important to watch for red flags that could indicate the need for a roof inspection, such as leaks or missing shingles.
| Specification | Minimum Requirement |
|---|---|
| Shank gauge | 12-gauge minimum |
| Head diameter | 3/8 inch minimum |
| Length | 1 1/4 inch or more (must fully penetrate deck) |
| Shank type | Ring-shank or screw-shank for high-wind zones |
Ring-shank and screw-shank nails dramatically increase pull-out resistance compared to smooth-shank fasteners. This is especially important for coastal structures and buildings over two stories where specific wind speeds generate greater uplift at the roof plane.
Proper nail placement matters just as much as nail type. On laminated architectural shingles, each nail must be placed in the manufacturer’s designated nail zone—typically a narrow band where the nail captures both shingle layers at the common bond. Nails placed too high miss the underlying shingle layer; nails placed too low can crack the tabs.
The difference between 4-nail and 6-nail patterns is significant:
- 4-nail pattern: Adequate for wind zones up to approximately 110 mph basic wind speed
- 6-nail pattern: Required in most hurricane prone areas with design speeds above 110 mph
- Some manufacturers specify extra nails at end joints for maximum hold
Cold-weather installations present a unique challenge. Asphalt shingles rely on factory-applied adhesive strips that activate in warm weather to create sealed asphalt shingles. Below approximately 40°F, this thermal sealing doesn’t occur. Professional installers add dabs of roofing cement under exposed edges to provide immediate wind resistance until warmer weather conditions activate the built-in adhesive.
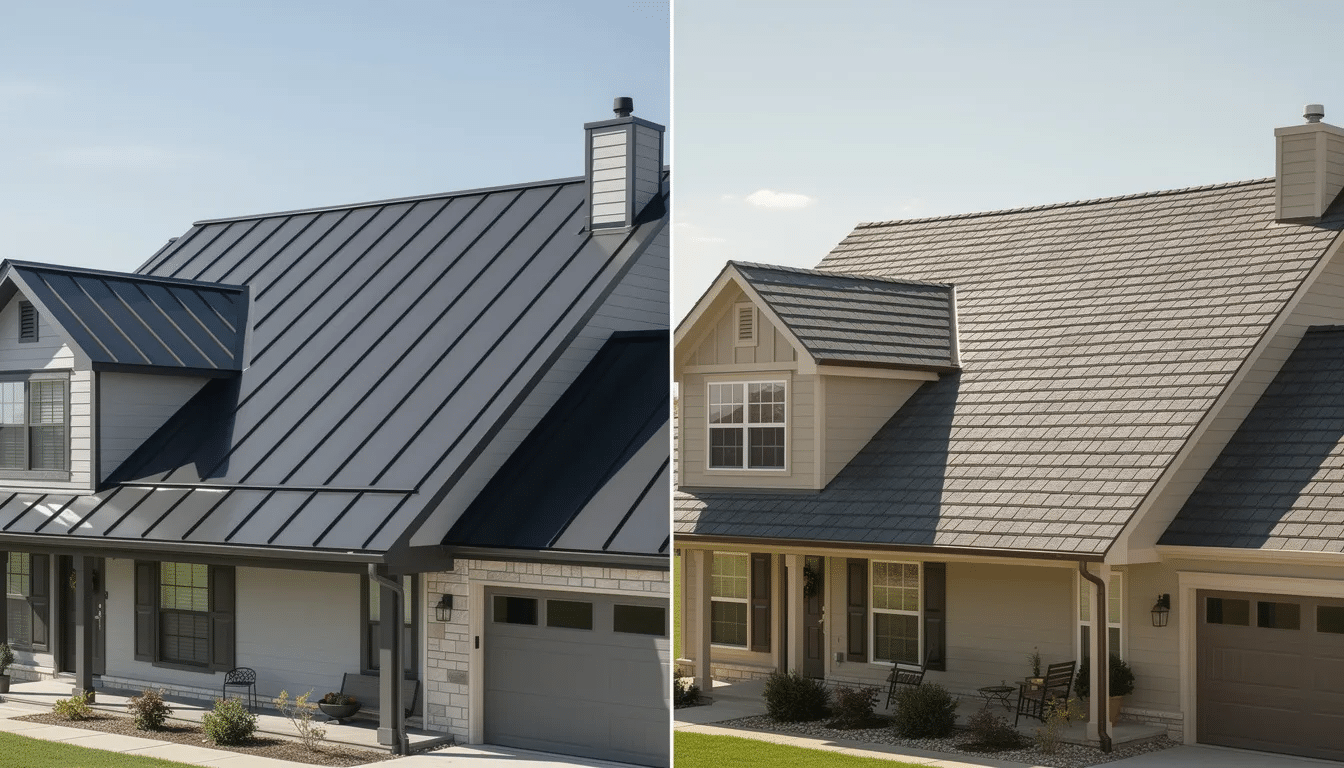
Selecting Roofing Materials for High Winds
No roofing material is truly “windproof”—but some significantly outperform others when properly installed. The three main categories for residential applications each have distinct advantages and limitations for areas prone to heavy winds.
Asphalt Shingles
Asphalt shingles remain the most common choice for residential roofing, and modern laminated (architectural) products offer genuine high-wind performance. When shopping for an asphalt shingle roof, look for these specific ratings:
- ASTM D7158: Classes D, G, and H, with Class H offering the highest rating for specific wind speeds up to 150 mph
- ASTM D3161: Classes A, D, and F, with Class F passed testing for 110+ mph conditions
- UL 2218 Class 4: Impact resistance for debris like tree branches and hail
Laminated shingles consistently outperform 3-tab products because their thicker profile and multiple layers provide better nail holding and resistance to lift. The best performers combine fiberglass mats with polymer-modified asphalt for flexibility under stress.
Metal Roofing
Standing seam metal roofing systems with concealed fasteners represent the gold standard for extreme wind resistance. These systems offer:
- Testing to UL 580, ASTM E1592, or FM 4471 standards with uplift ratings up to 180 psf (equivalent to roughly 170+ mph)
- Continuous panels without exposed penetrations that can catch debris
- Mechanical seams that lock panels together and accommodate thermal expansion
- Typical lifespan of 50–70 years versus 20–30 years for asphalt shingles
Metal roofing excels in hurricane and tornado zones because panels interlock rather than relying solely on adhesive bonds. However, initial costs run 2–3 times higher than asphalt, and installation requires specialized crews.
Concrete and Clay Tiles
Tile roofing offers excellent tested wind speeds—often 150–180 mph—when installed with proper foam, screw, or clip systems. The weight alone (8–10 pounds per square foot) helps resist uplift. However, tiles are more demanding structurally and can be brittle under impact from debris at lower wind speeds.
Regional recommendations:
- Coastal hurricane belts (Florida, Gulf Coast, Hawaii): Standing seam metal or Class H architectural shingles with 6-nail patterns
- High-plains tornado zones: Impact-resistant (Class 4) shingles with enhanced fastening and reinforced deck
- Mixed wind/hail regions: Stone-coated steel offers metal durability with better impact resistance than standing seam
System Details: Hips, Ridges, Vents, and Underlayments
Weak accessories cause failures even when the main field of the roof survives the storm. A roofing system is only as strong as its weakest component, and hips, ridges, and vents often represent the most vulnerable points.
Hip and Ridge Caps
Hip and ridge caps must penetrate through multiple shingle layers, any ridge vent material, and into the deck below. Standard 1 1/4-inch nails simply don’t provide enough embedment. For high wind regions:
- Use 2 1/2-inch to 3-inch nails for hip and ridge cap installation
- Double-nail each cap shingle in areas with design wind speeds above 110 mph
- Bed ridge caps in a 4-inch overlap pattern backed by underlayment for added protection
Ridge Vents and Soffit Vents
Ridge vents are particularly vulnerable to blow-off and water infiltration during storms. Select models specifically tested for high wind and wind driven rain resistance. In Florida, look for products with TAS 100(A)-95 compliance or equivalent testing. Install using manufacturer-specified nails and sealants—generic fasteners often fail to meet the standard test method requirements.
Soffit vents create a critical balance in the attic pressure system. If soffit vents allow wind-driven pressure into the attic while the roof remains sealed, internal pressure can actually push the roof off from inside. Ensure soffit vents are properly sized relative to ridge vents and protected from direct wind entry.
Sealed Roof Decks
The final backup layer is a fully sealed deck using self-adhered (peel-and-stick) roofing membrane underlayments or taped sheathing seams. These systems:
- Keep water out if wind strips shingles during a storm
- Prevent 90% of leak claims in documented storm studies
- Provide secondary protection while repairs are scheduled—making it important to choose the right roofing material for lasting durability and protection
In coastal high velocity hurricane zones, codes from the 2018–2024 cycles increasingly require sealed decks and specific vent products. The trend is toward treating these details as mandatory, not optional, because post-storm data consistently shows their value.
Codes, Ratings, and Warranty Considerations
Modern building codes based on ASCE 7 wind maps assign each location a design 3-second gust wind speed—commonly 115, 130, 140, or 150 mph in high-risk zones. This number drives every roofing decision from material selection to fastening patterns.
Key standards to understand: metal roofing standards.
| Standard | Applies To | What It Tests |
|---|---|---|
| ASTM D7158 | Shingles | Fan induced method wind resistance (Classes D, G, H) |
| ASTM D3161 | Shingles | Resistance method for weathering (Classes A, D, F) |
| UL 580 | Metal/membrane | Uplift resistance under varying degrees of pressure |
| ASTM E1592 | Metal roofing | Structural performance under uniform loads |
| FM 4471 | Metal roofing | Factory Mutual approval for wind and fire |
When selecting products, verify that both the rating and the written manufacturer warranty cover your local design wind speed. Many warranties include fine print requiring enhanced fastening, specific underlayment types, or professional installation to honor high-wind coverage. A shingle rated for 150 mph may carry only a 90 mph warranty if installed without the manufacturer’s prescribed methods.
Insurance considerations add another layer. In states like Florida, Louisiana, and Oklahoma, documented upgrades qualify for premium discounts:
- Fortified Roof certification can reduce premiums by 20–50%
- Hurricane clips and straps provide additional credits
- Class H wind-rated and Class 4 impact-rated products may qualify for separate discounts
Before starting any roof project in a high-wind zone, consult with a licensed contractor familiar with 2021–2024 code editions and check your local building codes for specific requirements. Many jurisdictions now require engineer-stamped plans for re-roofs in V-zones (velocity zones near the coast).
Practical Upgrade Paths for Existing Roofs
Not every homeowner is ready for a full roof replacement this year—but that doesn’t mean you’re stuck waiting for the next storm to reveal your vulnerabilities. Strategic upgrades at different price points can significantly improve your roof’s ability to withstand high winds.
Short-Term Improvements (Before Next Storm Season)
These measures require minimal investment but address immediate weak points:
- Schedule a professional inspection focusing on edges, ridges, and previous repair areas
- Replace loose or backing-out nails at eaves and rakes
- Add supplemental roofing cement under any lifted shingle edges
- Clear debris and trim tree branches that could become projectiles
- Verify attic access hatches are properly secured
Re-Roof Stage Upgrades
When replacing your roof, these upgrades add modest cost but dramatically improve performance:
- Renail the existing deck to Fortified specifications (8d ring-shank, 4-inch at edges)
- Install wider 5–6 inch drip edges with proper W-pattern nailing
- Use factory-sealed starter strips at all eaves and rakes
- Upgrade to 6-nail patterns throughout, not just at edges
- Switch to ring-shank nails for all shingle courses
- Add self-adhered underlayment at eaves, rakes, and valleys
Full Replacement Strategies
For maximum protection in high-risk areas, consider these comprehensive upgrades:
- Move from 3-tab to Class H laminated architectural shingles
- Install tested standing seam or stone-coated metal roofing
- Replace sheathing with 5/8-inch plywood where needed
- Add hurricane clips or straps if not already present
- Consider hip roof conversion if structure allows (reduces uplift 20–30%)
Timing matters in hurricane prone areas. Plan major roof projects for the off-season (November through April in the Atlantic basin) so work is complete before the June–November hurricane cycle begins. This also typically offers better contractor availability and potentially lower material costs.
FAQ
Can I windproof my roof without replacing it entirely?
You cannot achieve the same performance as a newly engineered roofing system, but you can significantly improve resistance through targeted upgrades. Renailing the deck from inside the attic (where accessible) using ring-shank nails addresses one of the most common failure points. Reinforcing edges with proper drip edge installation, upgrading loose fasteners to 6-nail patterns where accessible, and sealing vulnerable shingle courses with roofing cement all provide meaningful improvement. These measures won’t transform a worn-out roof into a new roof, but they can extend functional life and reduce the severity of storm damage.
What wind rating should I look for if my area’s design wind speed is 130 mph?
Choose shingles with ASTM D7158 Class H (rated for 150 mph) and ASTM D3161 Class F ratings, which provide a safety margin above your design speed. For metal or tile systems, look for products tested to equivalent or higher pressures—typically 90+ psf in wind tunnel or fan induced method testing. Equally important: ensure installation meets the manufacturer’s high-wind requirements, including 6-nail patterns, sealed underlayment at all edges, and proper drip edge attachment. A Class H shingle installed to standard specs may not honor its rating; full wind resistance depends on factors influence by both product and installation quality.
Is metal roofing always better than shingles in high winds?
Properly engineered and installed metal roofing often outperforms shingles in major hurricanes due to interlocking panels and concealed fasteners that resist debris impact better. Post-storm studies in Florida show metal roofs typically sustain less structural damage than shingle roofs in the same wind events. However, high-rated architectural shingles (Class H, 6-nail pattern, sealed edges) installed to Fortified specifications can still perform very well—and may cost significantly less. For most homes, the decision comes down to budget, aesthetics, and expected lifespan. Metal delivers superior durability (50–70 years vs 20–30 years) but at 2–3 times the upfront cost.
How often should I have my roof inspected in a high-wind region?
Plan for at least an annual inspection plus an additional check after any major weather event with gusts above 60–70 mph. Inspections should focus especially on edges (where uplift pressure is highest), ridges (where cap fasteners may back out), and any areas where debris has impacted the roof. In hurricane prone areas, a pre-season inspection in late spring gives you time to address issues before peak storm months. Post-storm inspections should happen as soon as safely possible—damage that appears minor can worsen rapidly if rain enters through compromised areas.
Will windproofing upgrades lower my insurance premiums?
In many states and coastal counties, documented upgrades qualify for meaningful discounts. Florida’s wind mitigation credits can reduce premiums by up to 44% for homes with hip roofs, hurricane clips, and high-rated materials. Louisiana, Oklahoma, South Carolina, and other states offer similar programs. Fortified Roof certification (Bronze, Silver, or Gold) provides standardized documentation that insurers recognize. Before beginning work, contact your insurer to understand exactly what documentation they require—typically photos, inspection reports, and contractor certifications showing specific installation techniques were used. The upfront investment in proper documentation can pay dividends for years through reduced premiums.
Contents
- Understanding Wind Damage and Why Roofs Fail
- Start at the Base: Roof Deck and Structural Attachment
- Edge Defenses: Eaves, Rakes, and Drip Edge Upgrades
- Fasteners and Nailing Patterns That Actually Hold
- Selecting Roofing Materials for High Winds
- System Details: Hips, Ridges, Vents, and Underlayments
- Codes, Ratings, and Warranty Considerations
- Practical Upgrade Paths for Existing Roofs
- FAQ

