
When severe weather hits and your roof takes damage, the problem is rarely just the missing shingles or the visible hole. It’s what comes next. Emergency roof tarping is often the first and most important step homeowners can take to stop water intrusion before a bad situation spirals into major interior damage. Whether the cause is hail, high winds, a fallen tree, or sudden structural failure, acting quickly can protect your attic, ceilings, walls, and personal belongings while permanent repairs are planned.
This article breaks down what emergency roof tarping actually does, when it’s necessary, and how homeowners should approach it safely. From understanding insurance expectations to knowing when a DIY solution is enough and when professional help is critical, the goal here is simple: help you make the right call during a stressful moment, before a temporary roof problem turns into a long-term headache.
Key Takeaways
- Emergency roof tarping is a fast, temporary way to stop leaks and prevent interior damage after storms, fallen trees, or sudden roof failures
- Acting within the first 24–48 hours after damage during 2025 storm seasons can dramatically reduce repair costs, mold risk, and insurance complications
- DIY tarping is only appropriate for small, safely accessible areas; large or steep roofs, or structural damage, require professional help immediately
- Insurers expect homeowners to mitigate damage—proper tarping with photos and receipts can strengthen roof damage claims
- Tarps are a short-term solution (typically 30–90 days) and must be followed by permanent roof repairs or replacement
When severe weather strikes and leaves your roof compromised, the clock starts ticking immediately. Emergency roof tarping serves as your first line of defense against cascading damage that can turn a manageable repair into a full-scale restoration nightmare. Understanding how emergency roof tarping works—and when to call in professionals—can save you thousands of dollars and months of headaches.
This guide covers everything homeowners need to know about temporary roof protection, from assessing damage safely to working with your insurance company and planning permanent repairs.
Understanding Emergency Roof Tarping
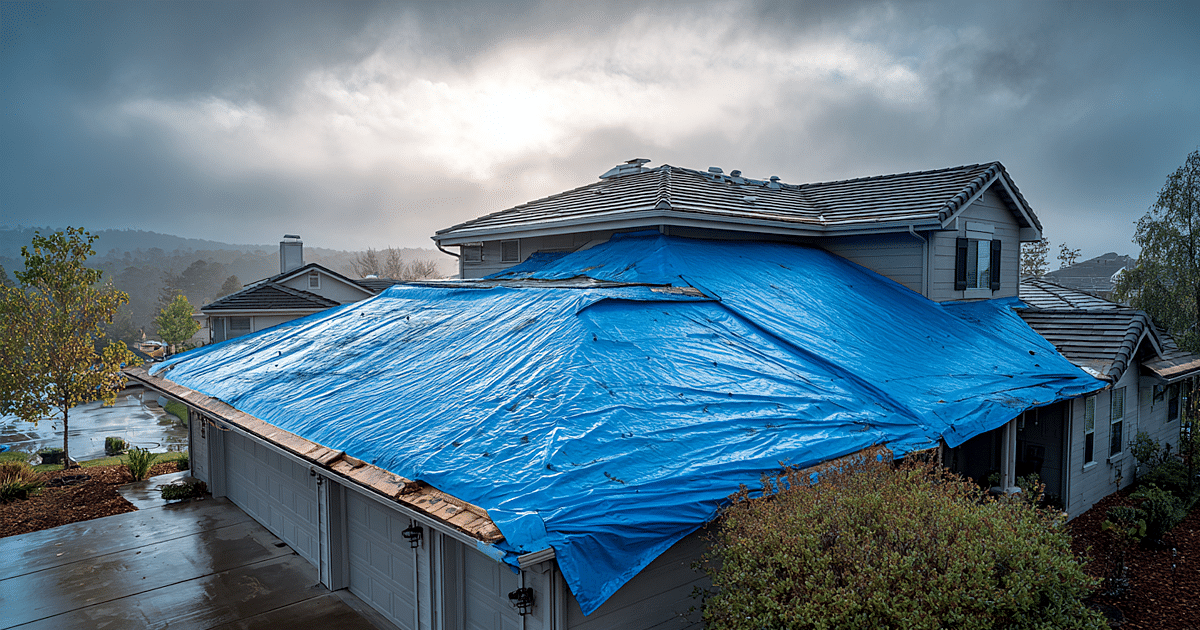
Emergency roof tarping means installing a heavy-duty, waterproof tarp over damaged sections of your roof to stop water intrusion after events like hailstorms, windstorms, or fallen trees. Think of it as applying a bandage to your home—it stops the bleeding until you can get proper medical attention.
This temporary fix is not a structural repair. It’s meant to protect your attic, insulation, drywall, and belongings until a roofing professional can perform permanent work.
- Common scenarios that call for emergency tarping include missing shingles, punctures from tree branches, wind-lifted roofing materials, fire-related openings, and ice dam leaks
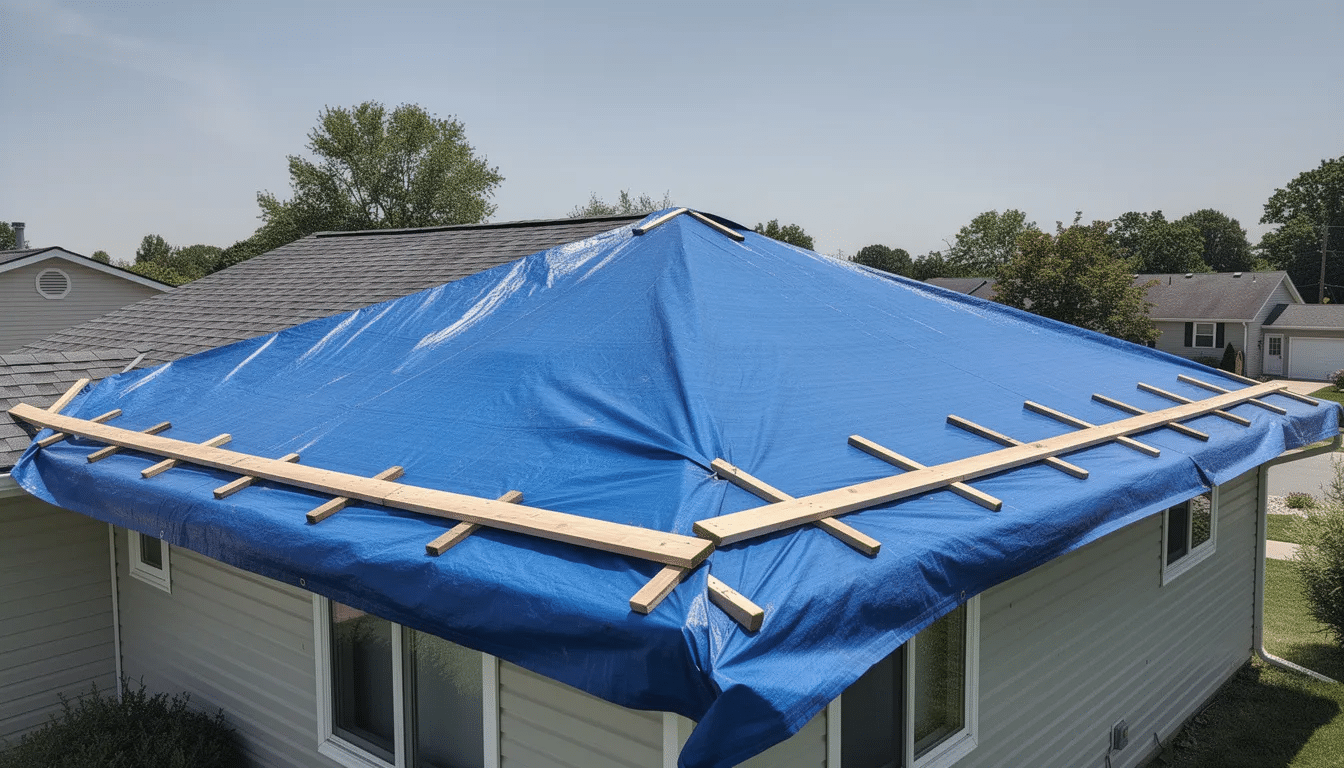
- A properly installed tarp extends beyond the damaged area and is mechanically fastened to the roof deck or framing to withstand rain and high winds
- Simply weighing down a tarp with bricks or loose boards is insufficient—the tarp will likely fail during the next storm
- Proper installation can reduce water ingress by up to 95% compared to loose-laid tarps under windy conditions
Why Emergency Tarping Is a Critical First Response
The first 24 hours after roof damage are crucial. Every minute an opening remains exposed, water can infiltrate your home’s most vulnerable areas. Speed matters because secondary water damage accounts for up to 80% of total storm-related repair costs according to industry estimates.
Here’s what happens when you delay:
- Unprotected openings allow rain to soak insulation, ceilings, wall cavities, and flooring in a single storm—multiplying your repair costs exponentially
- Moisture trapped in attics or wall cavities can begin supporting mold growth within 24–48 hours, especially during humid summer weather
- Wet insulation loses up to 50% of its R-value, compromising your home’s energy efficiency
- Wooden rafters can lose 20–30% of their load-bearing capacity within weeks when exposed to ongoing moisture
- Prompt tarping protects electrical systems, appliances, and personal items like furniture, electronics, and family keepsakes
Stopping further damage early often means the difference between a minor roof repair and a full interior restoration project costing $10,000–$50,000 or more.
When Homeowners Should Use Emergency Roof Tarping
Knowing exactly when to deploy emergency tarping can prevent costly delays. Don’t wait until water is pouring through your living room ceiling—by then, the damage has already multiplied.
Events that make emergency tarping urgent:
- Severe thunderstorms with high winds (60+ mph)
- Hailstorms with stones exceeding 1 inch in diameter
- Tropical storms and hurricanes
- Falling limbs or fallen trees impacting your roof structure
- Chimney or flashing failures during heavy rain
- Sudden storm damage from unexpected weather events
Interior warning signs requiring immediate action:
| Sign | What It Indicates |
|---|---|
| Active drips from ceilings | Direct water pathway from roof damage |
| Spreading water stains | Ongoing water intrusion behind surfaces |
| Bubbling or peeling paint | Moisture accumulating in wall cavities |
| Damp attic insulation | Compromised roof allowing water entry |
| Musty odors after rain | Early mold growth beginning |
Exterior indicators:
- Missing or cracked shingles covering 10–20% or more of the roof surface
- Exposed roof deck visible from the ground
- Visible holes from storm debris or impact damage
- Displaced ridge caps along the roof ridge
- Metal panels lifted along seams
- Damaged or missing flashing around vents and chimneys
Consider emergency tarping if a qualified roofing contractor cannot perform permanent repairs within a few days and more bad weather is forecast. Pre-storm tarping may also be appropriate when your roof is already damaged and a major weather system is approaching within 24–72 hours.
DIY Tarping vs. Calling a Professional
Safety and damage extent are the two main factors that determine whether you should attempt emergency repairs yourself or call in professional emergency roof tarping services.
When DIY tarping may be reasonable:
- Small leaks on a single-story home
- Low-slope roof (4:12 pitch or less)
- Solid decking with no visible sagging
- No structural damage to rafters or trusses
- Safe, dry conditions for roof access
- You have proper equipment and safety gear
When to call a professional immediately:
- Roof is steep (greater than 6:12 pitch)
- Home is taller than one story
- Visible structural roof damage including sagging or broken rafters
- Multiple damaged areas across the roof surface
- Large sections of missing shingles or exposed decking
- Tree or heavy debris still resting on the roof
- You lack proper safety equipment or roofing experience
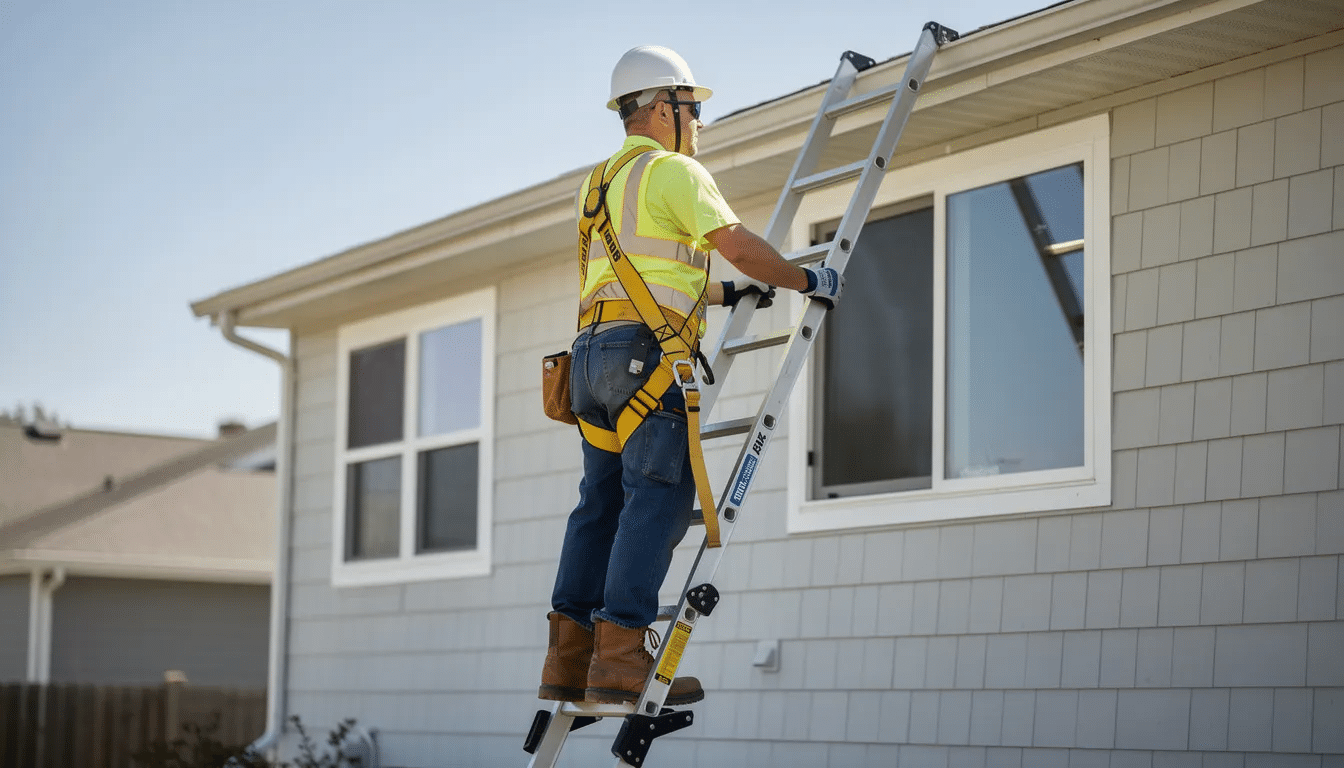
Professionals bring harnesses, roof anchors, OSHA-compliant ladders, and experience walking on damaged roof surfaces safely. Statistics show that 25% of roofing injuries involve falls, with heights over 20 feet dramatically increasing danger.
Poor DIY tarping can void manufacturer warranties, cause additional shingle and flashing damage, and potentially complicate insurance claims. DIY attempts see a 40% failure rate in high winds, compared to about 15% for professional installations.
Essential Materials and Safety Prep for Emergency Tarping
Safety comes first—no roof repair is worth a trip to the emergency room. Before you climb any ladder, make sure you have the right materials and have taken proper precautions.
Recommended materials:
| Item | Specification |
|---|---|
| Heavy-duty poly tarp | 6–8 mil minimum, 10–12 mil preferred, with grommets |
| Lumber for battens | 2×4 boards, length depends on damage area |
| Fasteners | Corrosion-resistant roofing nails (3-inch) or exterior screws |
| Sealing supplies | Roofing tape or plastic cap nails |
| Utility knife | For cutting tarp to size |
| Tape measure | For accurate damage assessment |
Essential safety gear:
- Non-slip boots with good traction
- Heavy-duty work gloves
- Eye protection (safety glasses or goggles)
- Safety harness with roof anchor for any moderate-pitch roof
- Type I or Type IA extension ladder, properly secured
- Hard hat if working near damaged or loose materials
Critical safety rules:
- Never work on a roof during lightning, active rainfall, or high winds over 20–25 mph
- Avoid roof work after dark when visibility is poor
- Never work alone—always have someone on the ground who can call for help
- Inspect the attic from below first to locate leaks without stepping onto potentially weakened roof deck
Consider creating a simple roof emergency kit stored in your garage each spring. Include tarps, 2×4 boards, roofing nails, a utility knife, flashlight with extra batteries, and a printed list of local contractors who handle roofing emergencies.
Step-By-Step Overview: How Emergency Roof Tarping Works
The emergency tarping process follows a logical sequence: assess damage from the ground and attic, measure the affected area, prepare the tarp and boards, install from the roof peak downward, and verify tightness and coverage.
These steps are for small residential areas only. Larger or complex jobs—anything involving structural damage, multiple stories, or steep pitches—should be left to roofing companies with commercial-grade equipment and proper insurance.
Throughout every step, prioritize personal safety. If any situation feels unstable or beyond your comfort level, stop and call a professional contractor.
Step 1: Assess the Damage Safely
Start your damage assessment from the ground, not the roof. Use binoculars to survey visible damage before climbing anything.
Ground-level inspection checklist:
- Look for missing shingles or bare spots on the roof surface
- Check for obvious holes or tears in roofing materials
- Identify torn or displaced flashing around chimneys and vents
- Note bent gutters or downspouts that might indicate impact
- Spot branches or storm debris resting on the roof
Attic inspection:
- Use a flashlight to check for dripping water
- Look for darkened or damp rafters
- Feel insulation for wetness
- Watch for daylight showing through the roof deck
Document everything with timestamped photos or short videos from multiple angles. This documentation is essential for insurance claims and should happen before any temporary roof repair begins.
Step 2: Measure and Prepare the Tarp
Accurate measurement prevents the frustrating scenario of discovering your tarp is too small once you’re already on the roof.
Measurement guidelines:
- Measure the damaged section’s length and width from ground level or attic access
- Add at least 3–4 feet of overlap on all sides for secure fastening
- A single larger tarp is more reliable than several small tarps pieced together
- For example, a 10×20 ft damaged area needs at least a 20×30 ft tarp
Tarp preparation on the ground:
- Lay the tarp flat and inspect for any tears or defects
- Position a 2×4 board along the edge that will sit at the roof ridge
- Roll the tarp around the board once or twice
- Fasten through both tarp and board using roofing nails or screws every 12 inches
- This creates a weighted, anchored edge that resists wind uplift
Preparing the tarp and boards on the ground rather than on the roof reduces time spent in a hazardous position and makes tarp placement much easier.
Step 3: Position and Anchor the Tarp
With your tarp prepared, it’s time for the actual installation. This is where having a helper becomes essential.
Installation process:
- Position your extension ladder securely, with a helper stabilizing it from below
- Carry the prepared tarp and additional 2×4 boards up carefully
- Have your ground helper hand up materials rather than carrying everything yourself
- Position the top edge of the tarp over the roof ridge or as high above the damaged area as possible
- Water should naturally run over the tarp, not under it
Anchoring sequence:
- Anchor the peak side first using the 2×4 board you attached earlier
- Fasten the board directly into roof deck or rafters using 3-inch roofing nails
- Pull the tarp tight down the slope, eliminating air pockets that cause ballooning
- Secure the sides with additional 2×4 battens positioned perpendicular to the slope
- Anchor the bottom edge last, with fasteners spaced every 12 inches
- All battens should extend 4–5 feet beyond the visible damage to counter wind-driven rain
Step 4: Check Coverage and Secure Vulnerable Areas
Once the tarp is fastened, walk around the property at ground level and visually confirm complete coverage of all damaged areas and exposed roof deck.
Final inspection checklist:
- Verify the tarp covers all vulnerable areas with adequate overlap
- Add extra fasteners at corners where wind uplift is most likely
- Reinforce all grommet locations with additional nails or screws
- Check that the tarp is tight enough to avoid significant flapping
- Confirm it’s not so tight that it might tear around fasteners during gusts
- Look for any gaps along roof edges where water could enter
Take “after” photos of the completed emergency roof covering from multiple angles. This documentation helps your roofing contractor understand what temporary measures were installed and supports your insurance claims process.
How Emergency Tarping Affects Insurance and Claims
Insurers in the U.S. generally require homeowners to take reasonable steps to prevent further damage after storms. Emergency roof tarping is a key part of fulfilling that duty—and failing to act can cost you.
Key insurance considerations:
- Most homeowners insurance policies reimburse reasonable emergency tarping costs when the underlying damage is a covered peril
- Covered perils typically include storm damage, wind, hail, and falling trees
- Insurers mandate documented mitigation within 24–72 hours for claim approval
- Approximately 15–20% of claims are rejected due to non-compliance with mitigation requirements
Documentation requirements:
| What to Document | How to Document |
|---|---|
| Damage before tarping | Clear photos from multiple angles with timestamps |
| Weather event details | Note date, time, and type of severe weather |
| Tarping process | Photos showing materials used and installation |
| Completed tarp installation | Photos of all covered areas |
| Receipts and invoices | Keep copies of all material and labor costs |
Failing to tarp a known opening and allowing additional rain damage could lead your insurance company to reduce or deny coverage for the avoidable portion of the loss.
Call your insurer’s claims line as soon as practical after a major storm—ideally within 24–72 hours—to report damage and ask about approved emergency services.
Working with Roofing Pros and Your Insurer
Navigating the relationship between your roofing contractor and insurance adjuster can feel complicated, but the right contractor makes it easier.
Choosing the right contractor:
- Select licensed, insured roofing contractors experienced with storm and emergency work
- Ask if they can coordinate directly with your insurance adjuster
- Verify they carry liability insurance and workers’ compensation
- Check references and reviews for emergency repairs specifically
- Avoid storm chasers who appear out of nowhere after severe weather hits
Documentation from your contractor:
- Request a written description of temporary tarping work
- Include date, roofing materials used, and photos
- Forward this documentation to your adjuster promptly
- Keep copies for your own records
Reputable local contractors can help you understand adjuster reports, compare scopes of work, and ensure emergency tarping and permanent roof repairs align with policy requirements.
Keep all receipts related to emergency roof repairs and short-term damage control—materials, labor, and even rental equipment—for possible reimbursement through your claim.
How Long a Roof Tarp Can Stay in Place and Next Steps
A temporary roof is just that—temporary. Tarps are deliberately short-term solutions, and leaving them on too long invites new problems including UV degradation, water pooling, and hidden rot beneath the covering.
Tarp lifespan guidelines:
| Tarp Type | Expected Duration | Notes |
|---|---|---|
| Standard polyethylene (6-8 mil) | 30–60 days | UV degradation accelerates in summer |
| Heavy-duty polyethylene (10-12 mil) | 60–90 days | Better tear resistance |
| Professional-grade PVC | 90+ days | Requires monitoring |
Ongoing maintenance requirements:
- Inspect the tarp after each major storm for tears, loosening fasteners, or water pooling
- Call a professional immediately if the temporary fix shifts or fails
- Check for flapping or billowing that indicates loosened anchoring
- Monitor your attic for new moisture or musty odors
Extended reliance on tarps allows moisture to build up beneath the covering, accelerates shingle deterioration on surrounding areas, and may impact manufacturer warranties. Building codes may also require permanent solutions within specific timeframes.
Schedule permanent repairs or roof replacement as soon as roofing contractors and materials are available—ideally well before the next severe weather season arrives.
Planning Permanent Repairs or Replacement
Once your property is safe and the emergency tarp is holding, shift your focus to the permanent solution.
Full inspection requirements:
- Request a complete roof inspection, not just a surface assessment
- Include evaluation of roof deck condition
- Check underlayment integrity beneath shingles
- Inspect all flashing around vents, chimneys, and roof edges
- Assess attic ventilation for adequacy
- Look for hidden damage to structural components
Getting accurate estimates:
- Obtain at least three written estimates from licensed roofing contractors
- Ensure estimates clearly separate emergency tarping costs from permanent work
- Compare scope of work, not just bottom-line prices
- Ask about timelines and material availability
Upgrade considerations for storm recovery:
- Impact-rated shingles that resist hail damage
- Improved synthetic underlayments for better water protection
- Enhanced flashing details at vulnerable areas
- Proper attic ventilation to prevent ice dams and moisture buildup
Confirm that all permanent roof repairs meet current local building codes and manufacturer installation guidelines to help prevent common TPO roofing problems. This protects warranties and ensures your roof structure will perform properly for years to come.
Frequently Asked Questions About Emergency Roof Tarping
Can I safely tarp my own roof, or should I always hire a professional?
Homeowners can sometimes handle small, low-slope sections of a one-story roof if they have proper safety gear, stable footing, and no signs of structural damage. However, if the roof is steep, wet, higher than one story, or damaged by a large tree or heavy storm debris, a professional should always be called.
Falls are responsible for 25% of roofing injuries, and amateur tarping attempts fail 40% of the time in high winds. No cost savings are worth a serious injury—when in doubt, stay off the roof and bring in an experienced, insured roofing contractor who handles emergency repairs regularly.
What thickness and type of tarp is best for an emergency roof cover?
For temporary protection, use a heavy-duty polyethylene tarp of at least 6 mil thickness, though 8–12 mil tarps offer better tear resistance and UV protection. Avoid the thin blue tarps sold for camping—they won’t survive wind and sun exposure.
Look for tarps with reinforced corners and metal grommets, which hold up significantly better than light-duty options. Professional roofers often use specialized roofing membranes or reinforced PVC tarps designed for extended stability in harsh conditions, with some lasting 500+ hours of UV exposure compared to 200 hours for standard polyethylene.
Will emergency tarping damage my shingles or void my roof warranty?
Improper installation—such as nailing directly through undamaged shingles or using oversized fasteners in the wrong locations—can damage roofing materials and may affect warranty coverage. This is one reason professional emergency roof tarping often makes sense even for seemingly minor repairs.
Reputable roofers minimize damage by fastening through 2×4 battens at strategic points and limiting new penetrations to areas that will be repaired or replaced anyway. Always ask contractors how they plan to secure the tarp and whether their approach complies with manufacturer guidelines.
How much does professional emergency roof tarping typically cost?
Costs vary by region, roof height, access difficulty, and damage size. Most residential emergency tarping jobs fall between $500 and $2,000, with many averaging around $1 per square foot for a typical 2,000 square foot roof.
Complex situations—multi-story homes, extensive tree damage, or post-hurricane demand surges—can push costs higher and double wait times for service. Remember that these are mitigation expenses that may be partially or fully reimbursed if the underlying damage is covered by your insurance policy.
What should I do inside my home after the roof is tarped?
Even after a properly installed tarp creates a barrier, take precautions inside your home. Remove or cover furniture, electronics, and valuables beneath previous leak areas with plastic sheeting or waterproof covers.
Place buckets or pans under any remaining minor drips. Run fans or dehumidifiers to start drying wet materials, and open windows when weather permits to improve ventilation. If ceilings, walls, or floors are significantly saturated, contact a water damage restoration specialist immediately—mold growth can begin within 24–48 hours in humid conditions, potentially adding $10,000–$50,000 to your costly repairs.
Contents
- Understanding Emergency Roof Tarping
- When Homeowners Should Use Emergency Roof Tarping
- Essential Materials and Safety Prep for Emergency Tarping
- Step-By-Step Overview: How Emergency Roof Tarping Works
- How Emergency Tarping Affects Insurance and Claims
- How Long a Roof Tarp Can Stay in Place and Next Steps
- Frequently Asked Questions About Emergency Roof Tarping

